While it may not be advertised publicly on Cloudflare’s website, you can definitely use the free service for dynamic dns on your Edgerouter! Below are the simple steps to setup Cloudflare Dynamic DNS on your EdgeRouter. Best of all, it’s super easy and there are a lot of great benefits and features that come along with the free version. Some of these features include but are not limited to:
- Unmetered Mitigation of DDoS
- Global CDN
- Shared SSL certificate
- I’m Under Attack™ mode
- Access to Cloudflare Apps
- Access to account Audit Logs
- 3 Page Rules included (Additional rules available for purchase through the dashboard)
With all these great features, what are you waiting for? – Sign Up
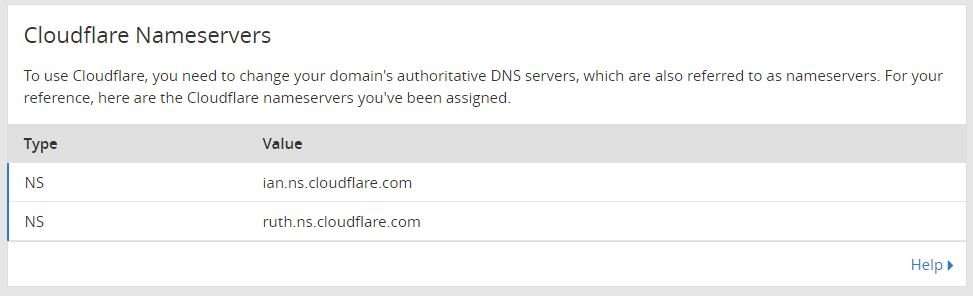
After you get signed up, you need to setup your website to use the cloudflare service. To do this, point the nameservers for your domain to the cloudflare nameservers listed in your cloudflare account. You can find out what your cloudflare nameservers are by logging into your cloudflare account, clicking on the DNS button and scrolling down to the bottom.

Additionally, to change your nameservers, you will need to login to the site where your DNS is currently being managed. Most likely, this would be the website you bought your domain from. If you have any difficulties finding the setting to change your nameservers, you may be able to find information on the provider’s website on how to do this. Once your website is successfully using cloudflare’s nameservers you will be able to move on to the next step, adding the entries to the EdgeRouter.
In order to setup the edgerouter to update your dns records to cloudflare, you need to get your Cloudflare Global API key. You can find it by clicking on your email/username and clicking the “My Profile” tab. Scroll down to the bottom view your Global API key. Copy that as you will need it in the steps below.
Next, connect to your EdgeRouter via SSH or access the CLI prompt. Once you are logged in, type “configure” and hit enter.
Below is an eample set of command you would issue via SSH or CLI to the edgerouter to setup dynamic dns is your website was www.yourdomain.com. You will need to modify the last parts of each line to reflect your domain/website, email and api key. One thing to note is the part “custom-cloudflare-www” can be anything as long it is unique to any other entries already existing in your edgerouter. Additional entries for other domains and subdomain would just need to be different. In other words, you could have “custom-cloudflare-www” for your first domain and “custom-cloudflare-shop” or “custom-shop” for your second domain.
set service dns dynamic interface eth0 service custom-cloudflare-www host-name www.yourdomain.com
set service dns dynamic interface eth0 service custom-cloudflare-www login yourcloudflare@email.com
set service dns dynamic interface eth0 service custom-cloudflare-www password yourcloudflareapikey
set service dns dynamic interface eth0 service custom-cloudflare-www protocol cloudflare
set service dns dynamic interface eth0 service custom-cloudflare-www server www.cloudflare.com
set service dns dynamic interface eth0 service custom-cloudflare-www options "zone=yourdomain.com"
Issue the commands above and type “commit;save;exit” and hit enter.
That’s it! You should now be able to see your dns updated in your cloudflare account under DNS!